Investigating breaches and malware infections on Windows system can be an extremely time-consuming process when performed manually. Through the assistance of automated tools and dynamic scripts, investigating incidents and responding appropriately becomes much more manageable with security professionals able to easily gather relevant results, artifacts, evidence and information necessary to make decisive conclusions and prevent future attacks.
(The title of this post could likely be nitpicked; professional computer forensics often involves the usage of write-blocking hardware and software such as EnCase/FTK/Autopsy in order to perform analysis on raw drive images. Redline is more of an incident response investigation tool than a professional forensic utility.)
One such utility often seen in an Incident Response and Forensics capacity is Redline, a free software package available from FireEye, a leading digital security enterprise. Redline provides investigators with the capability to dissect every aspect of a particular host, from a live memory audit examining processes and drivers, file system metadata, registry modifications, Windows event logs, active network connections, modified services, internet browsing history and nearly every other artifact which bears relevance to breach investigations. Data is easily manipulated with custom TimeWrinkle/TimeCrunch capabilities which assist investigators to filter for events around specific time-frames and additionally it is possible to provide a known set of Indicators of Compromise (IoC) in order to have Redline automatically gather data necessary to assess whether the provided IoC exist on the examined host.
In practice, Redline is extremely user friendly and easy to use even for first-time investigators, especially when compared to more advanced and complex software such as EnCase which is more specifically designed for in-depth forensic examinations.

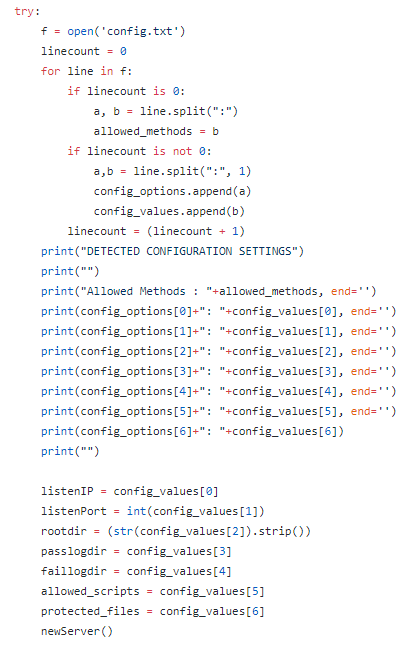
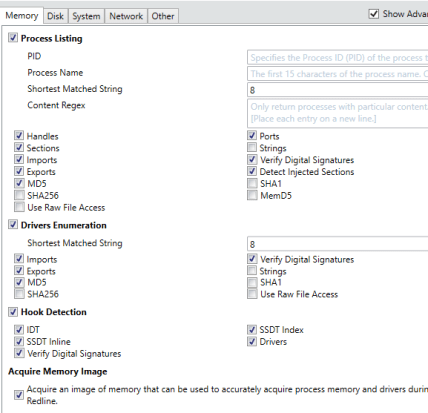
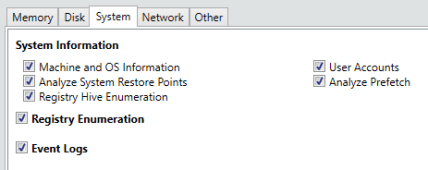
Opening the program will initially present the user with a screen where-in they can decide whether to Collect Data from the specified host or whether they are currently Analyzing Data which has previously been collected. Selecting ‘Comprehensive Collector’ will allow an investigator to edit a batch script for further customization in order to filter exactly what data will be collected from the host where the script will be executed. The configuration options allow for specification of various advanced parameters and settings with respect to what types of Memory, Disk, System, Network and Other information will be collected upon execution, as shown below.

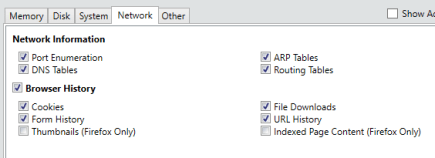

As is obvious from the above screenshots, Redline is capable of collecting an extremely wide variety of information and aggregating it into an easy to use and manipulate central database. Hitting ‘Ok’ after customizing the settings to the investigator’s liking will result in the creation of a script package which is recommended to be run off a USB when connected to the target device. An image of the resultant scripts is shown below.
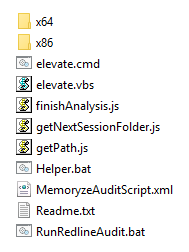
Now the investigator need only deliver these scripts to the target device and run ‘RunRedlineAudit.bat’ and the scripts will attempt to collect all of the previously specified information. As expected, this can take some time, especially so if the investigator also wishes to dump the live memory from the system. Once complete, the investigator will end up with a collection of files that must be transferred back to the analysis machine, shown below.

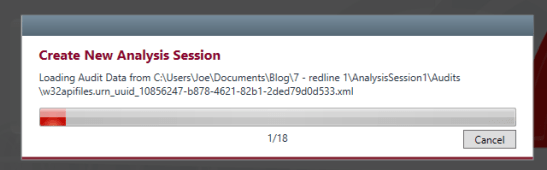
This will also include a ‘.mans’ file which can be opened in Redline to begin the analysis procedures. Opening this up can also take some time depending upon your computer’s capabilities and the size of the data collected so don’t worry if it seems to be hanging.
Once loaded, Redline presents the investigator with a series of options that can help streamline an analysis by helping analysts discover information which is pertinent to their end-goal. The options are given below,
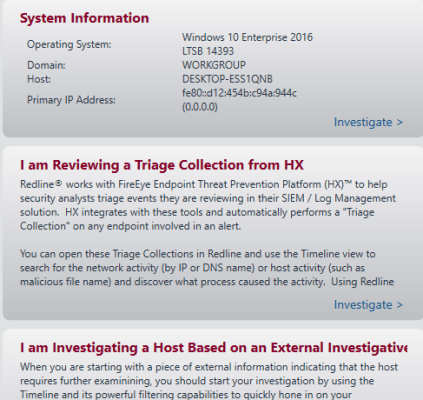
It is not necessary to select any one of these and the analyst can simply begin to explore the utility and collected information via the menu options located on the left side of the screen, shown below.


As seen above, many of the data categories can be expanded to explore additional information such as Alternate Data Streams for NTFS files, Process Handles/Memory Sections/Strings/Ports, Task Triggers, files accessed via the Prefetch and various other information. I will skip over the review of basic sections such as the System Information and focus on more interesting details. Although these sections can provide useful data they are not quite as ‘fun’ to look at typically. Let start with an overview of the ‘Processes’ section.


These are the main categories available upon selecting the general ‘Processes’ section. As we can observe, there is a multitude of data such as the path the process was executed from, the PID, the username it was executed via, when the process was started, any parent processes, a hash of the process and data relating to potential digital signatures and certificate issuing. This information is useful as a starting point to understanding what processes were active in the system when the memory was dumped via Redline.


We can also observe whether any current processes have active Handles to various portions of the OS such as certain files or directories. It is also possible to observe additional process information such as how it is active in memory, the strings possessed and the ability to perform a Regex search using different strings and the ports being utilized by various active processes as shown below.


Utilizing this information can be especially useful for computer forensics investigations dealing with networked malware that may be trying to ‘phone home’ or perform additional styles of remote communication. Identifying the active ports or previously made connections can greatly ease the process for forming network or host based signatures.


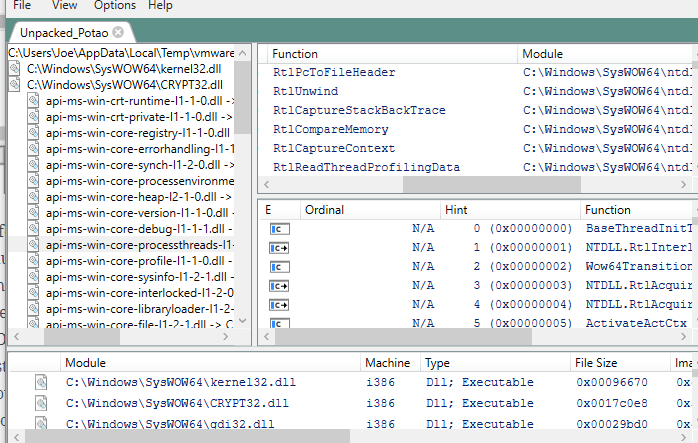
Redline includes the ability to capture a snapshot of the entire filesystem along with typical information such as certificate/signature data, INode information if a Linux system is being investigated and various attributes and username/SID data which may be useful for understanding and reconstructing a basic timeline of events. It is also possible to view data such as contained ADS, export/import information and various other data as shown below.


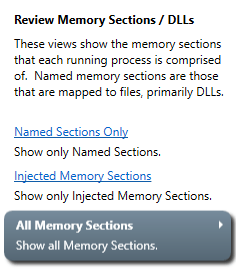
This can be helpful in order to quickly determine if potentially dangerous, unwanted or unknown DLLs are being called by malware on a specific system. Moving on, analyzing and assessing the state of registry hives is important in identifying unknown or malicious keys and values which may have been installed in attempts to form persistence for a particular binary. An example of the registry view in Redline is shown below.

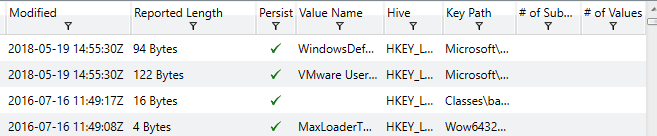
We can see Redline also attempts to perform an analysis as to whether or not the value is associated with persistence on the system, making it easy to identify potentially dangerous keys which may have been recently modified or created. Another common tactic utilized by malicious software in an attempt to gain system persistence is the usage of Windows services set to auto-start or triggered by common tasks. Some examples of the Service examination screen in Redline are shown below.


The above screenshots show most of the data categories but do not include all of them. It helps analysts to understand if services are set to auto-start or another mode of operation, the type of service, the username it was started under, whether it will achieve persistence and various other information investigators may find useful when determining how and when a system was compromised. Additionally, Redline has a specific ‘Persistence’ data tab which compiles information on Windows Services, Registry and file relationships which helps to understand what is persisting on a system throughout restarts and how exactly it is achieving said persistence. Some screenshots of this tab are shown below.


This represents a small portion of the data available – all of the information you might find under the Registry, Service or File System section is available in the Persistence section for effected items and helps compile all information together in one easy to manage location.
Sometimes malicious software will attempt to install or utilize different user accounts on a particular system. Knowing how and when different accounts were used, created or modified can help in timeline reconstruction activities. Redline aggregates this data into the ‘User’ tab with some of the information given shown below.

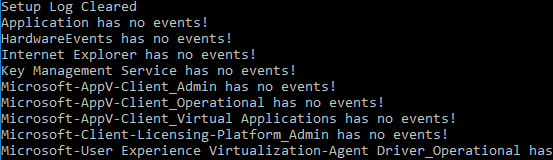
Knowing when the last time an account was used or changed can help give some context into the actions taken on a device. Something that can help even more is a review of the Event Logs on a Windows system. This built-in auditing capability is extremely useful to provide an even greater amount of context towards timeline reconstruction. Event Logs are typically stored at (C:\Windows\System32\winevt\Logs) and contain tremendous amount of data which can be parsed by investigators to understand what happened in particular time-frames. An example of Redline aggregating this data into a central log is shown below.


Correlating data from the various event logs and understanding how and when data and events occurred can greatly assist in determining when certain binaries were executed, files created, registry keys modified and any other action that may have been taken on the system. Another common method that malware may utilize in an attempt to achieve persistence or other actions is the usage of triggered or scheduled Window’s Tasks. Redline has the capability to analyze tasks on a specific system and prevent data relating to each, as given below.
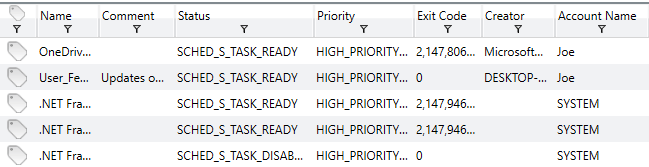

This is a sample of the data available which includes how the task is scheduled, the associated priority and task creator, the level it is scheduled to run at, correlated flags, when it was created and both the last and next scheduled run-time. Identifying malware attempting to persist through the usage of Window’s tasks can be simple when utilizing Redline to perform an analysis of existing tasks. Additionally, it is possible to view data related to specific task triggers and actions taken upon execution, shown below.

Knowing the actions which may trigger a task such as Windows Logon/Logoff or other specific mechanisms can help identify how a binary is attempting to function or achieve persistence on the local system, providing methods to mitigate future or current attacks. Another important piece of information to examine when performing a system investigation is the data regarding active ports on the device. A screenshot of Redline’s capabilities regarding this data is shown below.

We can see information such as the associated process and ID, the path to the process, the state of the port and associated local IP, the local port being utilized, any remote addresses which have been connected to on the port and the protocl which is being utilized. This can be especially useful for identifying malicious software which may be communicating with remote or local addresses through standard port-based mechanisms.
Sometimes a malicious binary may try to establish a driver DLL to be loaded on next boot, perhaps attempting to override an established driver or install a new one which may achieve a lower level of persistence. Redline has the capability to analyze detected drivers and display information related to their path, size and memory address information as shown below.

In addition to base drivers, attackers may also attempt to modify or receive information such as filesystem data, keystrokes, received or transmitted packets or other information through the installation of layered device drivers on top of legitimate drivers. Layered drivers can be reviewed through a specific driver tree tab in Redline with an example of this data shown below.

It is also possible to double-click any detected driver in order to review advanced information collected regarding the specific driver. Hooking into Windows functions via installed modules is yet another method used by malicious software writers to intercept or otherwise modify legitimate functions. A sample of the data available regarding hooked functions is shown below.

Additional information regarding signatures and certificates is also available but not shown to avoid section repetition. Analyzing these function and module relationships can potentially reveal the existence of software which is not expected that may be the result of malicious activity.
Returning back to an inspection on network data, Redline has the capability to review existing ARP and Routing Table data on the local system. This can help give investigators some sense of learned routes and whether or not ARP data has been poisoned by attackers in an attempt to execute a form of Man-in-the-Middle attacks or other re-directing. Some examples of this data from Redline are shown below.


Another important feature of Windows useful in forensic investigations is the Prefetch, which stores information relating to when files were last opened/executed, their creation and how many times they have been executed. An example of this in Redline is shown below.

Knowing how many times a file has been run and when the last run-time is can be useful in investigating and reconstructing a time-line of events and knowing what the last files accessed were prior to some other events that took place on the system. Redline also gives information related to the history for disk drives, connected devices and installed registry hives but these will not be pictured as they are relatively self-descriptive.
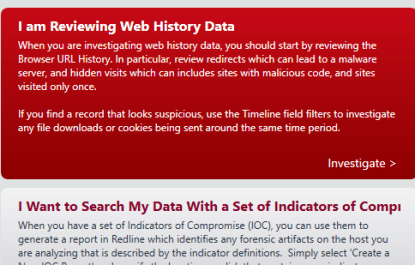
Another interesting piece of forensic data often used by investigators is the Browser URL History on a specific system. Knowing this can help determine how a system was compromised if it occurred through some remote interaction with an attacker’s URL. Redline makes it easy to browse through this information by allowing filtering through Visit Types (From, Once, Bookmarked), Typed URLs, Hidden Visits (Invisible Iframes, etc) and records which include HTML forms, allowing simple parsing for the above categories. An example of the Browser URL History tab is shown below.


Knowing when a site was last visited, the username which triggered the visit, whether or not it was a ‘hidden’ visit and other information can help narrow down root causes for detected compromises. Another important feature which helps investigate network related root causes is the receipt or transmission of associated cookies. Analyzing existing cookies on a device can help give investigators an idea of how an account or system may have been compromised. The images below give a sense for the type of information provided by Redline in order to achieve this goal.


One of the last but perhaps most important feature present in Redline is the built-in Timeline capability. It is possible to use checkbox filters to determine which data an investigator would like to present on the timeline, including data related to File System History, Processes, Registry data, Event Logs, User Accounts, System Information, Port Data, Prefetch information, Agent Events, Volumes, System Restore Points, URL History, File Downloads, Cookie information, Form History and DNS Entries. Essentially, any data that Redline has previously collected can be displayed in the overall timeline and correlated with other data, making this perhaps the most important feature for forensics investigators attempting to reconstruct an overall timeline related to all events on a specific system. Having all of this data together in one central hub makes correlation analysis much easier than having to parse it together from the various individual sources. Some example screenshots of the timeline feature are shown below.


Additionally, Redline features two special mechanisms known as TimeWrinkle and TimeCrunch which allow investigators to manipulate the overall timeline to achieve more granular data related to specific time-frames. This can include hiding irrelevant data or expanding relevant data to provide a greater view into events that may occurred in rapid succession.
Overall, Redline is one of the most in-depth incident response analysis tools available to investigators. It is provided free of charge via FireEye and integrates well with other log-analysis and processing utilities as well as many managed security services. There exist many tools and utilities which provide the same functionality but having an all-in-one tool such as this to both collect, parse and analyze available data makes this perhaps one of the best pieces of software available to anyone wishing to perform digital forensics on Windows systems.